How can I make my photos look vintage? Five easy ways to do
This entry was posted on September 18, 2023.
Have you ever wondered how aesthetic it would be if some nostalgic photos had a vintage tone? Capturing beautiful pictures with a vintage touch can have an undeniable charm that fills your heart with warmth. The faded colors, sepia style, and subtle imperfections can do wonders for a picture, evoking a sense of nostalgia and warmth in us.
There may be some photos of you with your friends, family, or pets to which you wish to add a vintage tone, as seen in black and white images. This article also aims to help you understand and learn how to make a photo look vintage in different ways and methods.
Make Your Photos Look Vintage: Five Easy Ways To Do It
Vintage Looks and Retro Style have been gaining popularity in today's digital photography and photo editing world. It is easier now than ever to make your ordinary photos have a vintage aesthetic and look old by giving them warm tones, slight imperfections, etc.
You no longer need a film camera or adjust your camera settings to give your photo a vintage filter and make it look like a medieval or renaissance portrait. Now, applications let you add such vintage photo effects to your pictures or adjust their settings to make them look like authentic vintage images.
These applications allow you to change your picture to any type of vintage look, be it polaroid, monochrome, tintype, sepia, etc. In this article, we will provide you with five ways that you can make your photos look vintage and evoke a sense of nostalgia in you.
1. Using Luminar Neo
Luminar Neo is a popular photo editing application that edits pictures using AI-based tools. The different tools that the website provides can help you boost any of your photographs, be it landscape or portrait.
Among the many available AI-powered editing tools, Luminar Neo has the apt tools to give your photos a vintage look. The below steps will help you understand how you can achieve the same using this useful photo-editing tool.
Step 1: Login or Subscribe to Luminar Neo
The first thing that you have to do to be able to start using Lumina Neo is to sign up or log in to the editing tool. If you already have an account, all you have to do is log in to the website.
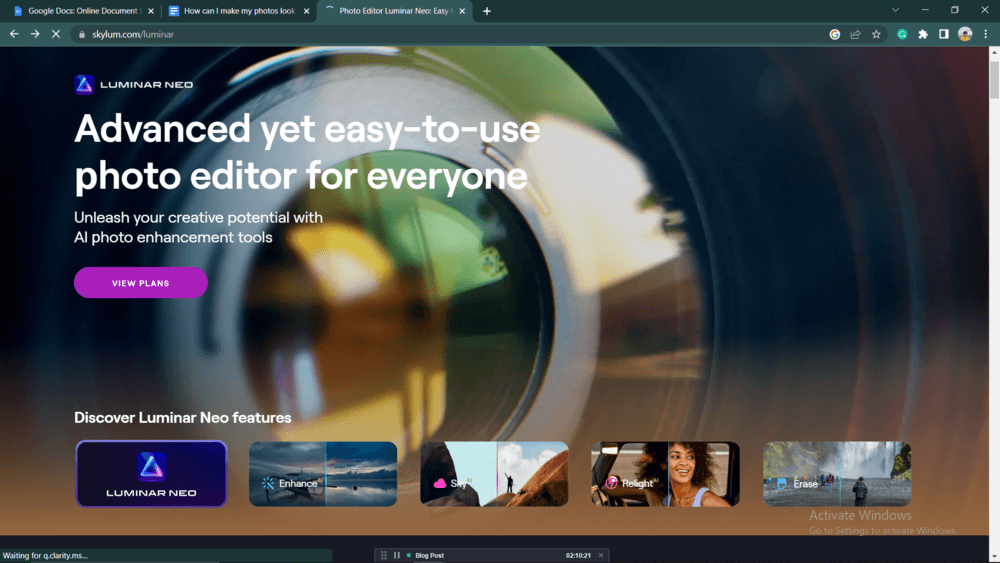
Source: Luminar Neo
If not, you will have to click on the 'View Plans' icon that you notice on visiting the website and select one that works the best for you. The premium rates for Luminar Neo are $8.25 for a monthly subscription and $149 for a lifetime subscription.
Step 2: Add Image to Luminar Neo
Once you have subscribed and logged in to Luminar Neo, you have to proceed by adding those photographs to which you want to give a vintage look. You can also edit a sample photo first to learn how to do it well. You have to add the pictures while in the Catalog Mode on the website.
Step 3: Switch To Edit Mode
Once you have added the photo you wish to give a vintage look to, click on it and move it to the Edit Mode option. You will find the option on the top of the Luminar Neo window. You can also take the picture to the edit mode by clicking on it and pressing 'E' on your keyboard.
Once switching to edit mode, make the essential adjustments that may be necessary for your painting. That is, fix the exposure, correct any lens errors, fix the perspective, and adjust the brightness and shadows, etc., of the image. It is best to enhance it and give it a retouch before you provide it with a vintage effect.
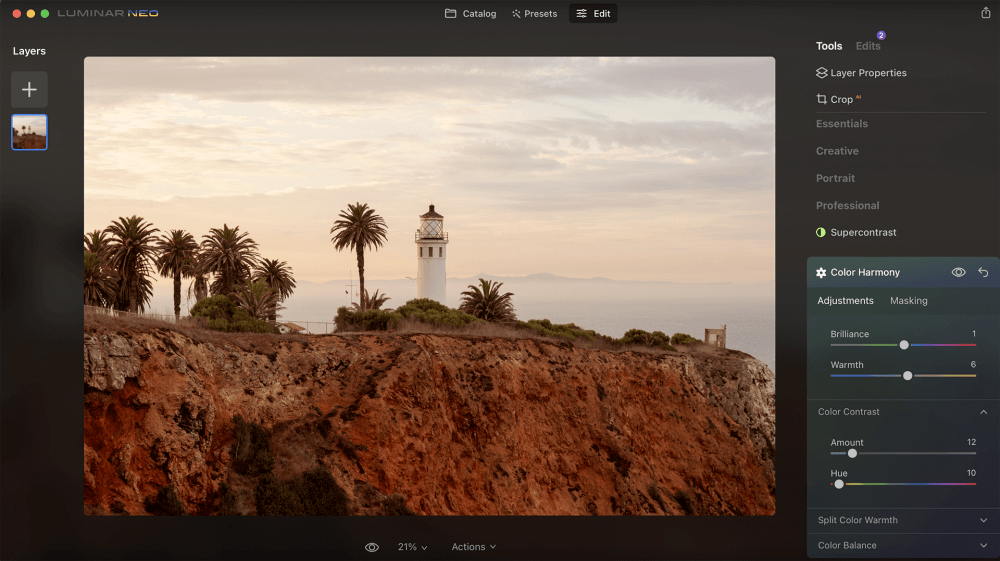
Step 4: Choose the Develop Tool
Once you are in the Edit Mode, you can proceed to give a retro look to your photo. The first thing that you have to do to start the process is to choose the 'Develop Tool' from the Essentials section of the Tools menu on the right-hand side of the window.
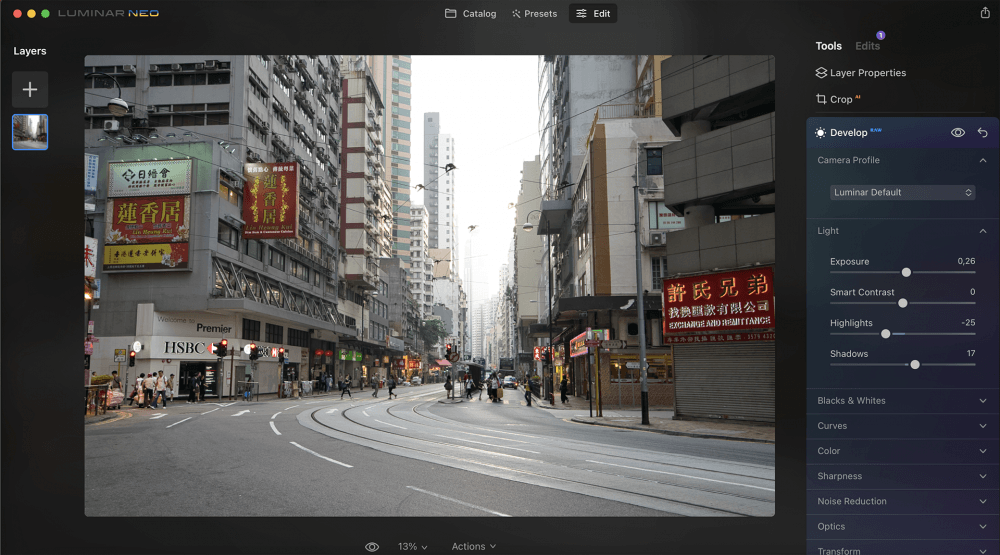
Source: Luminar Neo
When you click on it, a drop-down menu will appear. Scroll down on the menu and choose the 'Optics' option. You will find a few check buttons on doing so. Ensure that you check all those boxes, and once that gets done, you can close the Optics option.
Now choose the 'Noise Reduction' and 'Sharpness' options. Change the 'Luminosity' to 20 from the Noise Reduction drop-down menu and 'Sharpen' from the Sharpness menu to 40. You must also change the 'Masking' option in the Sharpness drop-down menu to 75 so you don't sharpen anything in the image that is not detailed or focused.
The next options you must choose are 'Light' and 'Blacks and Whites.' From the Light drop-down menu, add some Exposure (0.08), Contrast (20), and Shadows (10), and bring down the Highlights (-10). After that, move to the Blacks and Whites drop-down menu, add a bit of Blacks (10), and reduce some Whites (-10).
Step 5: Add Noise
One of the key features of vintage photos is the slight imperfections and noise it possesses. So, it is important that you add noise to the photograph you are editing to get a complete retro look.
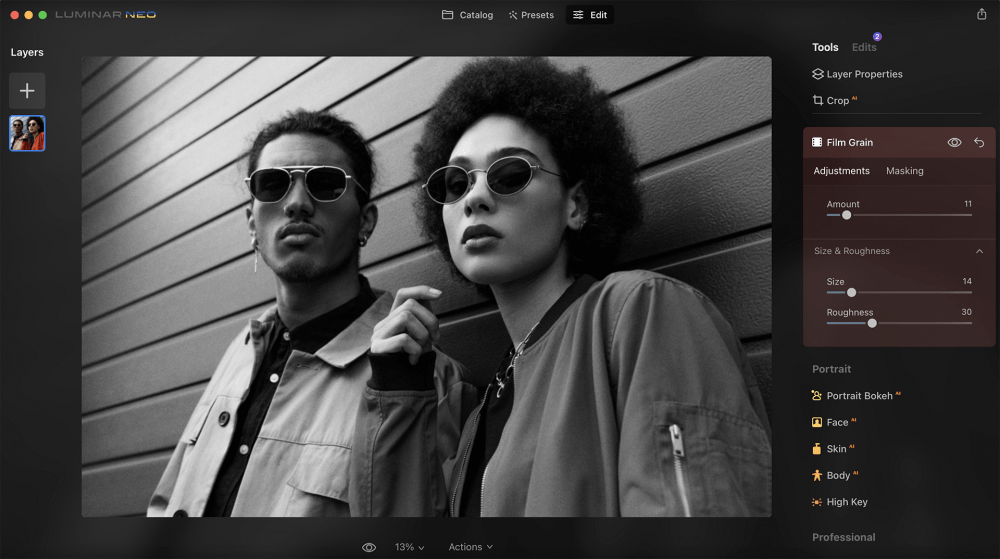
Source: Luminar Neo
You must add a new adjustment layer called noise by giving it 100% Opacity and Normal Blending mode. Then select this layer and choose the 'Creative' category from which you must take the 'Film Grain' vintage filter.
You have to then adjust the parameters of the vintage photo filter, like the size, amount, and roughness required, until you have achieved the exact feature you need for the vintage edit for your photo.
Step 6: Add Tint
Next, you must add a new adjustment layer called Tint with 100% Opacity and Normal Blending Mode.
You have to then select this layer and choose the 'Light' option from the 'Essentials' category, which provides you with several sliders. You can change these sliders accordingly to adjust the color temperature and tint.
Source: Luminar Neo
Similarly, you must choose the 'Color' option from the same category and use the sliders provided to adjust the hue and saturation. In addition, the 'Color Enhancer' option from the 'Professional' category can help change the color contrast and warmth of the Tint to help you get the exact retro look you are going for.
Step 7: Add Vignette
You must add a final adjustment layer called Vignette with 100% Opacity and Normal Blending Mode. You can then choose the layer and proceed to add the Vignette filter from the 'Essentials' category.
You have to create a circular mask that can simulate lens vignetting. You can then adjust the inner light, roundness, feather, size, and intensity of this photo filter using the provided sliders.
Step 8: Save and Export The Image
Once you finish all the above steps, your vintage edited photo will be ready. You can now save the image in the file format of your choice and the apt quality settings.
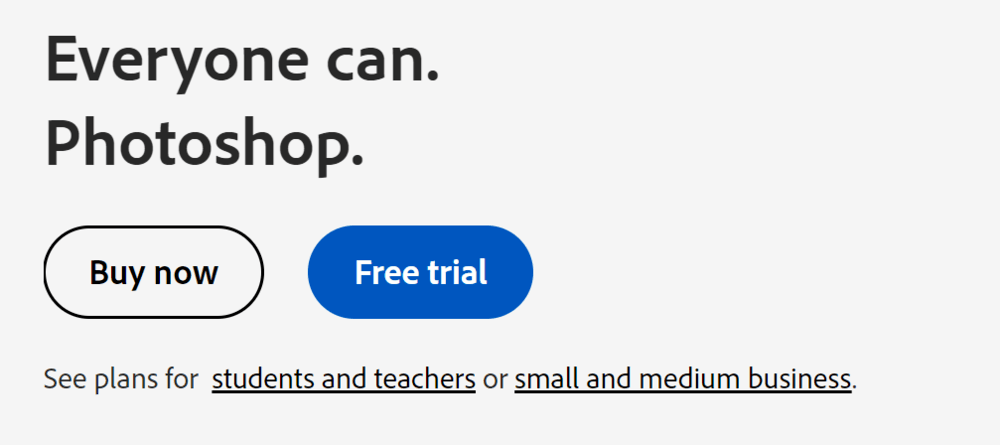
2. Using Adobe Photoshop
Adobe Photoshop is popularly known as one of the best applications for editing photos in many different ways based on the users' choice. It is also one of the best applications that you can use to give your pictures a vintage aesthetic.

Source: Adobe Photoshop
You can use the following steps to give your photos a retro look that can help evoke different feelings like nostalgia in you.
Step 1: Login or Subscribe to Adobe Photoshop
The first step you should perform before you can start converting your favorite pictures into vintage ones is to log in or subscribe to Adobe Photoshop.
If you are a returning user who already has a subscription, all you have to do is either log back in or open the website to proceed with the editing process. If that is not the case and you are a new user, you will have to subscribe to the editing tool by opting for either the $20.99 per month plan or the annual plan that costs $239.88.
Source: Adobe Photoshop
Either way, you will get a 7-day free trial, and within this period, you can feel free to discontinue the subscription.
Adobe Photoshop is also available on your mobile devices. So, if you prefer your phone to edit your photos, you can download the application from either Google Play Store or iOS Store.
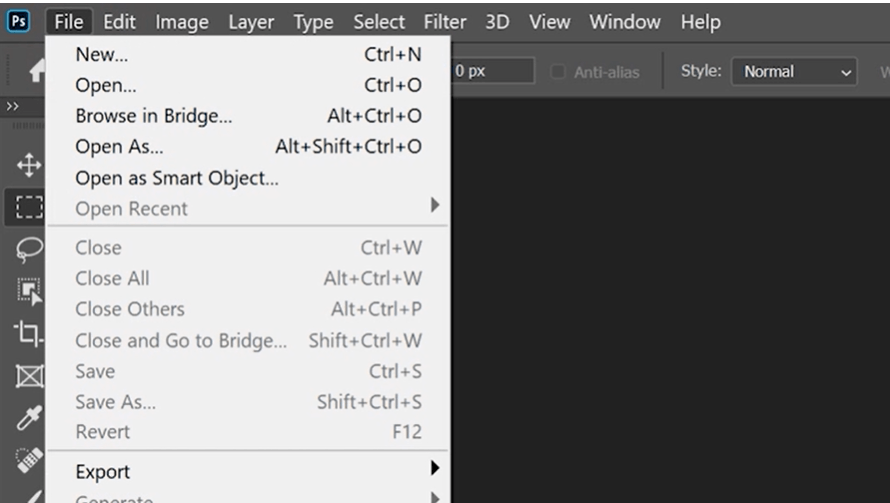
Step 2: Choose A Photo
Once you have logged in or subscribed to Adobe Photoshop, it is time for you to choose and add the photo that you want to give a vintage look to.
On the editing page, you will find the ‘File’ option located on the menu bar at the top of the edit window. From the drop-down that appears on clicking the option, choose the ‘Open’ option, and your computer will take you to the file browser from where you can browse and find the image you want to make vintage.
Source: wikiHow
Once you have found the image, click on it and choose the ‘Open’ option in the right-hand corner or double-click on it.
Step 3: Flatten Your Photo
Once you have uploaded the photo that you want to give a vintage look to, the next step that you must follow is to flatten it.
You have to create a new Image Adjustment Layer first to perform this process. Then open the 'Layer' option that you will find in the menu bar at the top of the edit window. Choose the 'Flatten Image' option from the drop-down menu that appears.
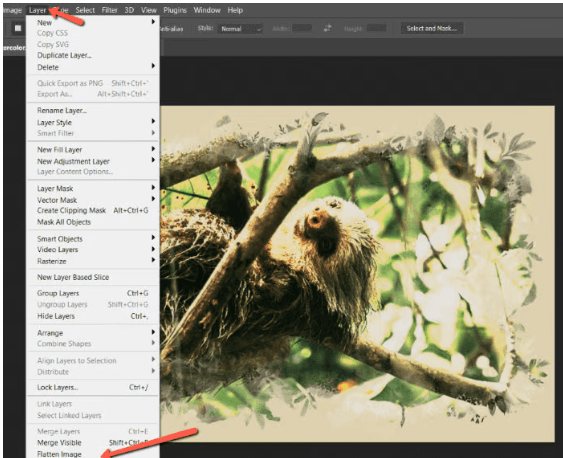
Source: PhotoshopBUZZ
On clicking this option, you will see that Photoshop has flattened or lessened the contrast in your uploaded picture. You have to then increase the blacks and lower the whites, which will let you achieve the typical faded and flat look that is present in all vintage photos.
Step 4: Edit the Contrast and Brightness in Your Photo
You have to now flatten the image further by adjusting the overall Brightness and Contrast of your image. For this, you have to create another Image Adjustment Layer.
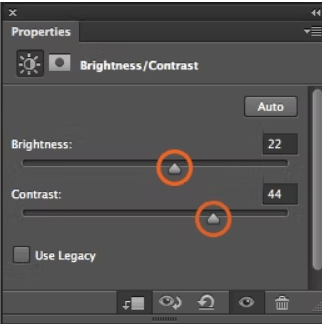
Source: 99 designs
A small properties window will appear upon choosing this new layer. In this window, you will find two sliders that let you adjust the Brightness and Contrast of your image. You have to proceed to change the sliders, mostly the Contrast slider, to adjust accordingly and get the perfect look.
Step 5: Get The Color Right
You may have noticed how the old photos you may have come across have faded tints. It is normal for them to lose their vibrance over time, which is what is called the vintage or retro look. So, when aiming to give your photo a vintage look, you have to adjust the color of your picture to match the typical shade of vintage images.
To create the effect perfectly, you first have to choose the 'Curves' tool from the drop-down menu of the Image Adjustment Layer. You can then adjust the sliders accordingly to explore the different effects.
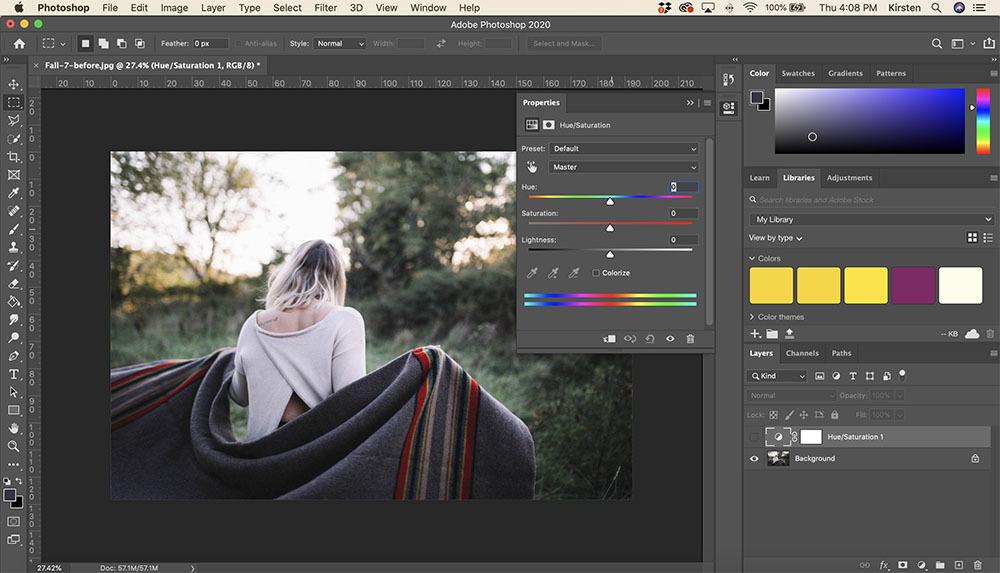
Source: Hue and Hatchet
You will notice that each of the sliders is responsible for the different elements that determine the color of a photo. There are sliders for Hue, Saturation, and Color Balance.
Since no photo has similar properties and color balance, it is hard to provide a fixed size. There is no particular one that fits well for all pictures. So, the best thing you can do is to experiment with each of the color editing tools and find the perfect combination that works well to provide the right color for your image.
Step 6: Add a Little Noise
Once you have got the color right, the final step for giving your image an authentic vintage look is adding visual noise. As mentioned earlier, one of the key features of vintage pictures is the slight imperfections that it possesses. So, it is important for your image too to have those.
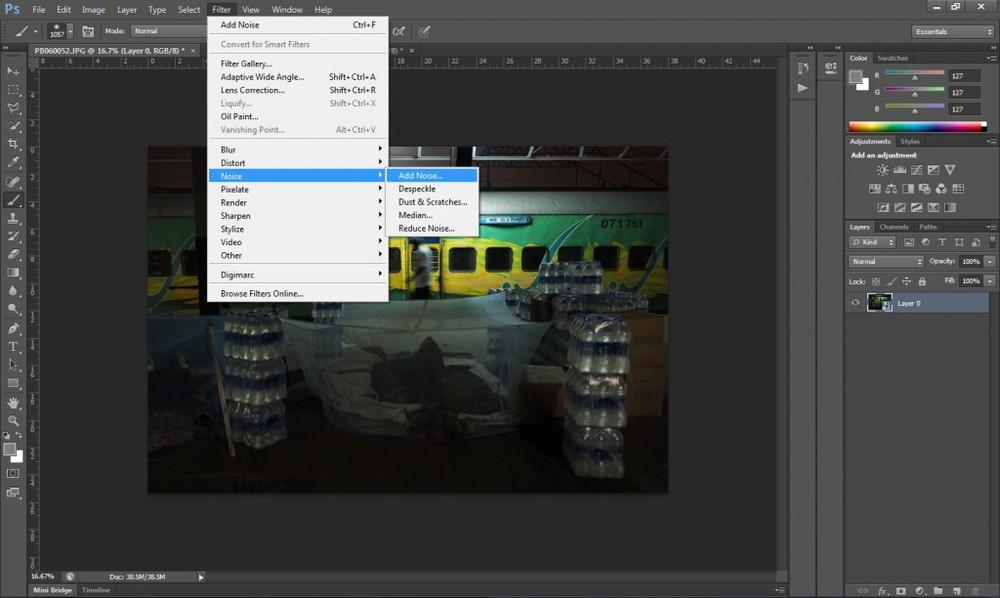
Source: Better Photography
To give this feature to your picture, you have to choose the vintage ‘Filter’ option from the menu bar at the top of the edit window. You will see that many photo filters appear in a drop-down menu from which you have to choose the ‘Noise’ option. All you need is a little subtle noise to get a vintage look for your image.
Following the above-mentioned steps and playing around with the relevant editing tools can help you get the perfect vintage look for your photo. There are many ways to edit an image to give it a retro look, especially in Adobe Photoshop. So, experimenting with new photo effects is welcome while you are in the process of editing.
3. Using Fotor
Another excellent photo editing website that you can use to give your photos a vintage look is Fotor. This is a popular website with several unique and useful photo editing tools that can help you edit images how you want to.
It is available on IOS and Android devices. You can transform any ordinary image to a vintage image using photo editing tools with the help of Fotor by following these steps:
Step 1: Sign In to or Sign Up for Fotor
First, you have to Sign In or Sign Up to Fotor before editing your desired photo to give it a retro feel. If you already have an account, all you have to do is sign in by typing in the account details.
However, you must sign up if you are new to the editing software. You can use the website for free, but if you wish to have better features and editing options, you have to subscribe to its premium version, Fotor Pro.
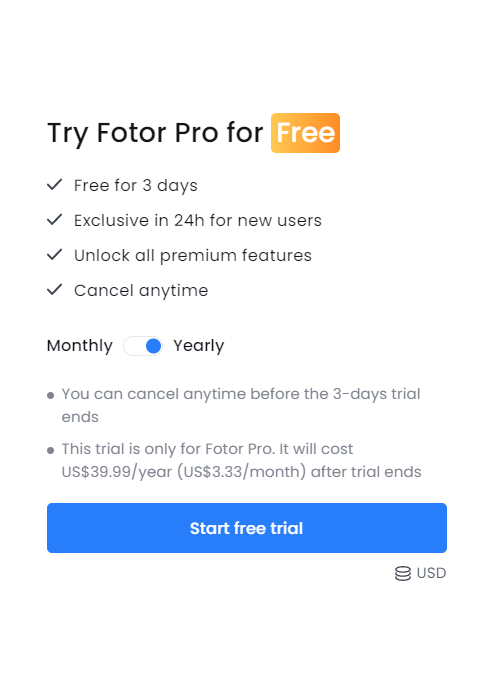
Source: Fotor
You can use Fotor Pro for free for three days. After this period, the free-trial ends, and you have to subscribe annually by paying $39.99 per year or $3.33 per month.
Step 2: Upload A Photo Of Your Choice
On signing in to Fotor, you will see the option 'Upload A Photo.' On clicking this option, you will go to Files, from where you can choose your desired photo.
Source: Fotor
Step 3: Adjust The Contrast
On opening the image you want to give a retro look, you will be taken to Fotor's edit window. Adjusting your photo's contrast is the first step toward giving it a vintage look.
To proceed to do so, you have to click on the 'Basic' option that you will find in the menu bar on the left-hand side of the edit window. You will notice that a drop-down menu appears from where you have to click on the next 'Basic' option.
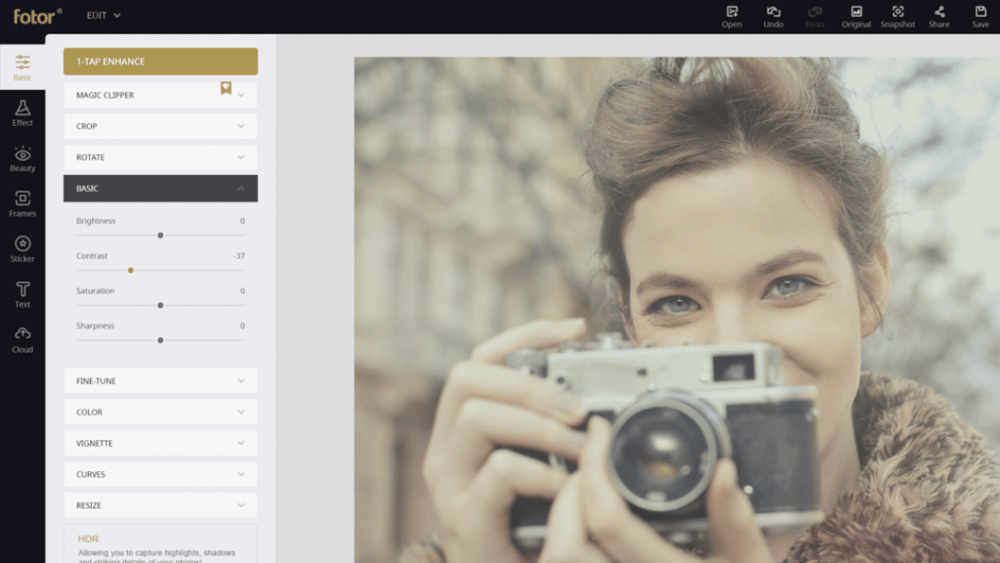
Source: Fotor
On doing so, you will notice that different sliders that indicate the different features of your photo appear. In this step, you must choose the Contrast slider and adjust it according to how old you want your image to look. The lower the contrast level, the older it will look.
Step 4: Adjust the Brightness
The next step after you have adjusted the contrast is to adjust the brightness. You may have already noticed how the Brightness slider is also present in the same drop-down menu as the above one. This slider is located just above the Contrast slider from the previous step.

Source: Fotor
You have to slightly increase the Brightness of your image to achieve the ‘hazy’ and blown-out look that vintage pictures generally have. Sometimes you might be able to skip this step as for some images, decreasing the contrast might lead to an automatic increase in the brightness of the image.
Step 5: Adjust the Saturation
The next thing that you have to do is to lower the saturation. You will feel the Saturation slider just before the Contrast slider in the same ‘Basic’ drop-down menu.

Source: Fotor
It is best to only lower the saturation a bit to get the perfect retro look for your photo. However, if you are going for a more vintage look, then you can remove all the color in the photo until you feel like you are there.
Step 6: Add Tint
The next step to giving your image a vintage look is to add a tint to it, like black and white, sepia, or yellow tint. This has to also be done by clicking the ‘Basic’ option from the menu bar on the left-hand side. On the drop-down menus that then appear, you have to click on the ‘Color’ option.
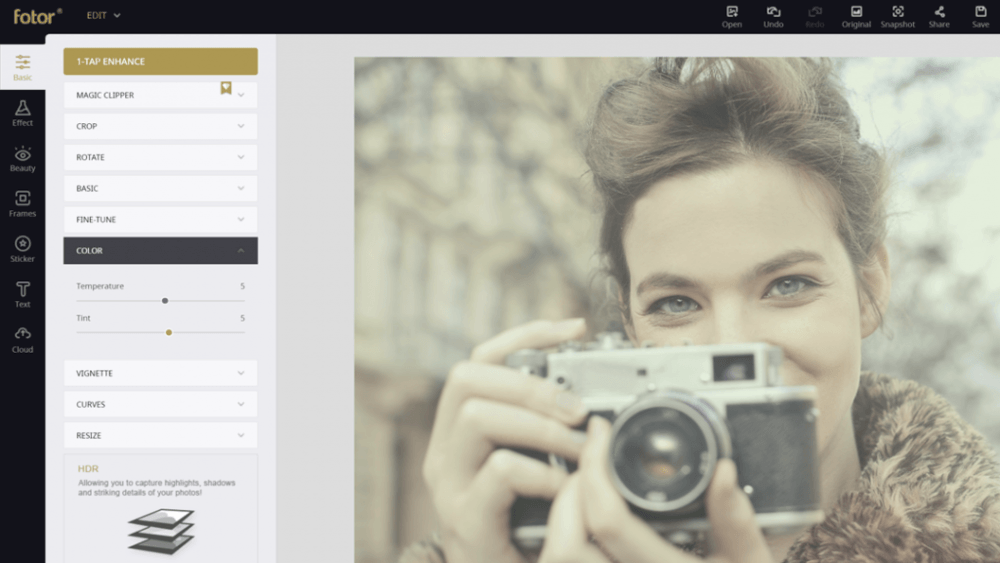
Source: Fotor
Another drop-down menu will then appear with two sliders for ‘Temperature’ and ‘Tint.’ You can proceed to add a bit of color by adding a five on both of these sliders.
Step 7: Add vignette effect
Vintage photos are known to have a darkened edge or vignette effect. So, you have to also add such an effect around the edges of your image to create a vintage feel for it.
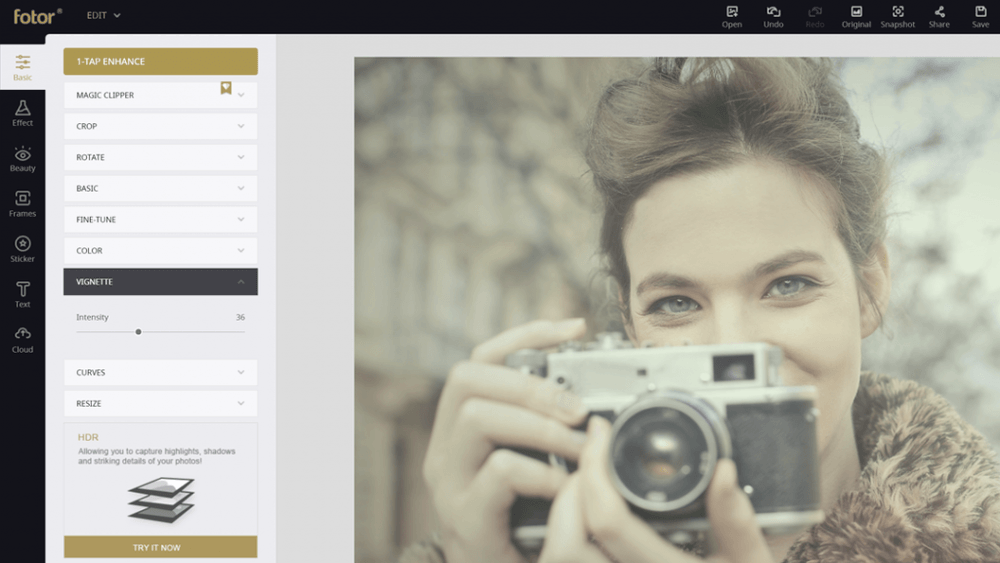
Source: Fotor
You will find the' Vignette' option in the same 'Basic' option drop-down menu from the above step. On clicking on it, you will notice that an 'Intensity' slider appears. You can adjust the intensity based on the feel you want your photo to have.
Step 8: Add Noise
Adding noise is a very important step to get the complete retro or vintage feel for your photo. To do so, you have to choose the ‘Effect’ tab from the menu bar on the left-hand side of the edit window.
From the drop-down menu that then appears, choose the 'Film Grain' option. A drop-down menu will then appear with the 'Intensity' and 'Roughness' sliders. You can play with the sliders and adjust them until you create a vintage look for your photo.
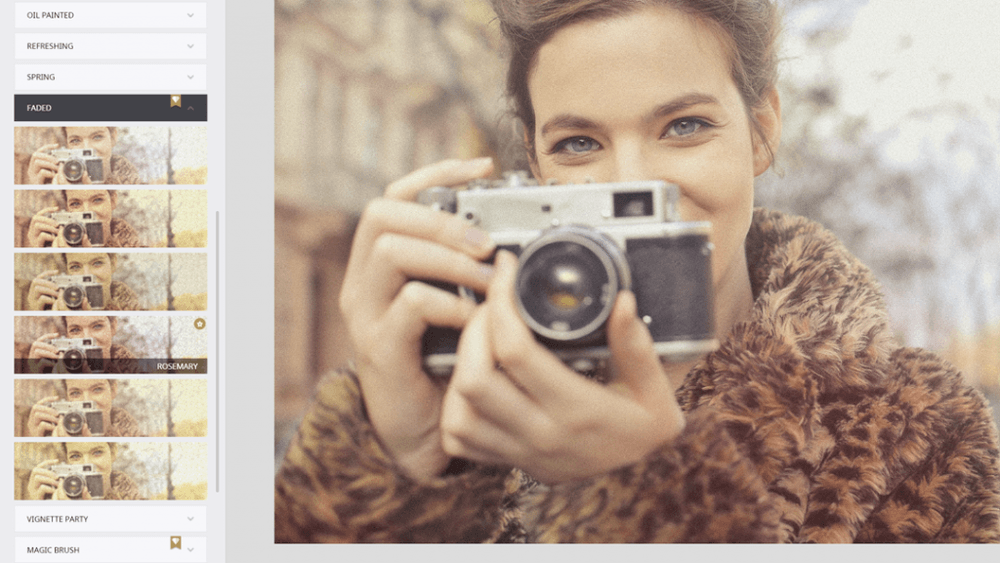
Source: Fotor
Another way to add grains to your photo is by using the many vintage filters available in the ‘Vintage’ and ‘Faded’ sections. You can adjust the Intensity of the vintage photo filter you use with the sliders and even mix or match the many photo filters to get the look you desire for the photo.
Step 9: Add Vintage Borders or Textures (optional)
If you want to go the extra mile, Fotor offers additional options to add vintage borders, textures, or overlays to your photo.
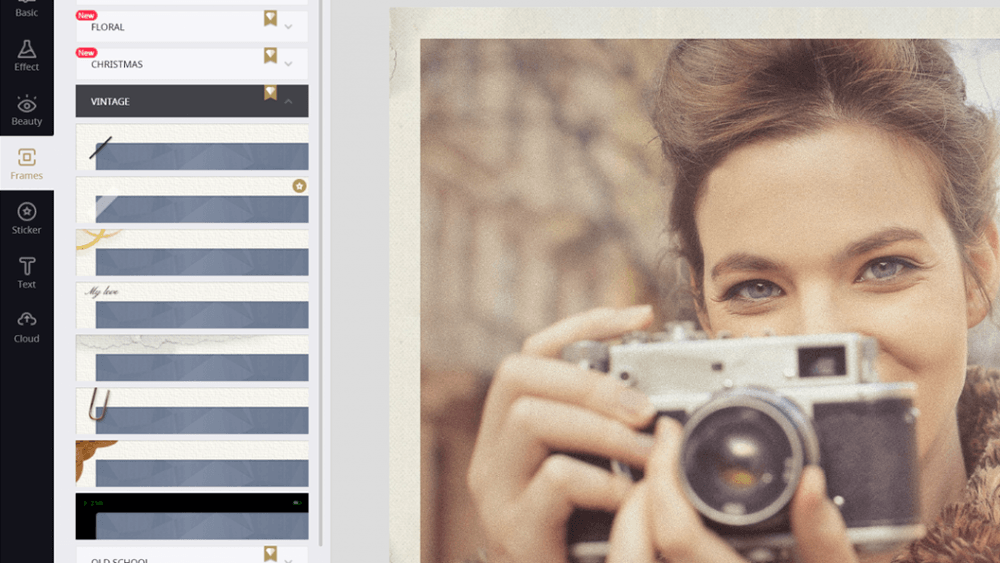
Source: Fotor
A paper texture frame or border can help add a good vintage effect to your picture. You can find such frames from the ‘Frame’ tab in the menu bar. You can open options like ‘Vintage’ and ‘Old-School’ to get retro-looking frames for your picture.
Step 10: Add Stickers (optional)
You may have noticed how vintage images have slight imperfections that look like scratches, marks, etc. Giving such textures to your picture is the way to complete its retro look.
You can do so by adding stickers that you can find in the 'Stickers' tab in the menu bar. You will discover countless number stickers there that will help you add roughness or paper textures to your photograph. They are perfect for getting the old and antique look for your photo.
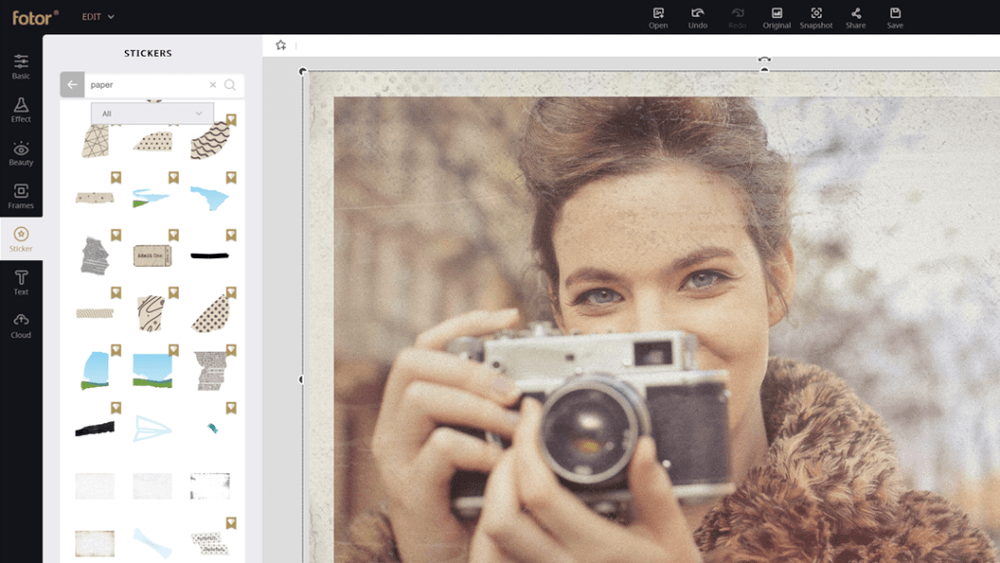
Source: Fotor
You can choose such stickers that you think are great, drag them to the canvas, and adjust their position. You can even enlarge or reduce the size of the stickers using the anchor point you will find around the image.
Finally, increase or decrease the opacity of these textures using the 'Transparency' icon. You will find this option that comes with a slider on the upper right-hand corner of the canvas. You can adjust to match your expectations.
Step 11: Save and export
Once you are satisfied with the vintage effect applied to your photo, save the edited photograph. You can choose the desired file format and quality settings and then select a destination folder to save the picture on your device.

Source: Fotor
You can follow the above steps to use Fotor and make your photos look vintage and give them a nostalgic charm.
4. Using PhotoWorks
PhotoWorks is another editing website that lets you edit and convert your favorite photos into vintage pieces. This editing website has all the tools necessary for you to transform any picture of your choice into a retro-looking one.

Source: PhotoWorks
You can follow the below-mentioned steps to effectively use PhotoWOrk to edit and give your pictures a vintage and antique look.
Step 1: Launch PhotoWorks
The foremost step you have to follow before editing your picture is to, of course, launch Photoworks and log in or sign up for the software. The software is not directly accessible on its website. You have to download the application first before you can use PhotoWorks.

Source: PhotoWorks
After downloading the application, you have to run it and then create an account or log in to your already existing account. Once all such procedures are done, you can edit the photo.
Step 2: Import your Photo
The next step you need to follow is to add the photograph of your choice onto the application to give it a retro look. To achieve the same, you can click on the ‘File’ option in the menu bar that you can find at the top of the edit window.
A drop-down menu will appear, and from it, choose the ‘Open’ option and proceed to choose and upload the photo. You can also drag and drop your favorite image from the files in your device onto the edit window.
Step 3: Make Necessary ChangesTo The Color and Light of The Image
If your chosen photograph is a bit dark, there is a chance it will get darker during editing. So, it is better to avoid the situation simply by using the auto-correction tool that you will find in the Enhancement Tab.
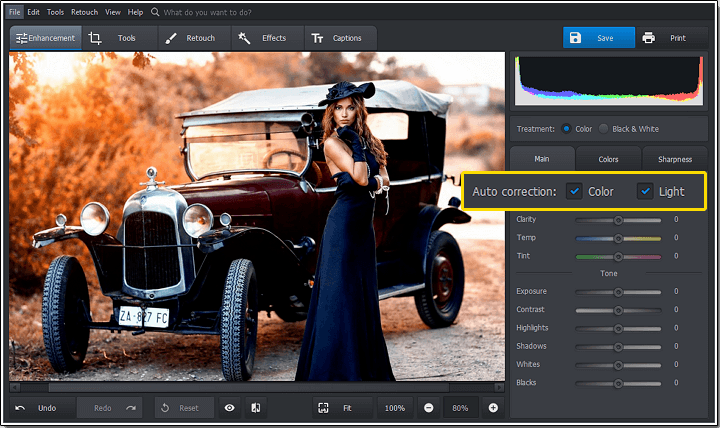
Source: PhotoWorks
This option provided by PhotoWorks is capable of adjusting and applying the best color and light settings that can work for your photo.
Step 4: Apply Vintage Filters
Click on the ' Effects ' tab from the panel right below the menu bar. A menu will then appear on the right-hand side of the edit window. Scroll down and find the 'Vintage' category. Here, you'll see various vintage filters to choose from. Click on a vintage filter to preview it on your photo and choose one that works well for your picture.
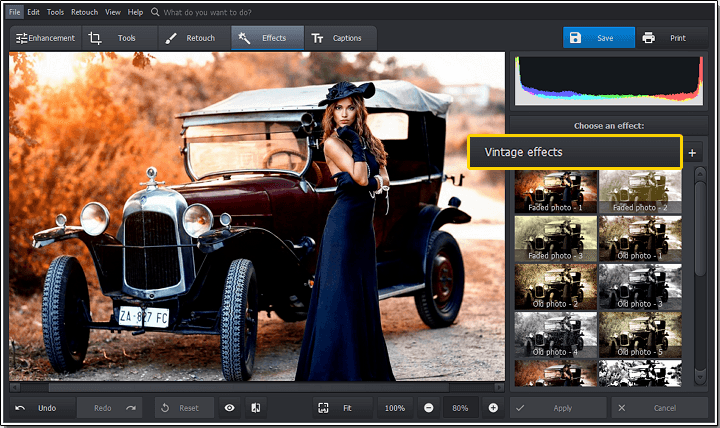
Source: PhotoWorks
Step 5: Adjust the Effect Amount
Once you've selected a vintage filter, you can fine-tune its settings. Use the sliders provided to adjust parameters like intensity, fade, saturation, and more. You can experiment with different settings until you achieve the desired vintage effect.
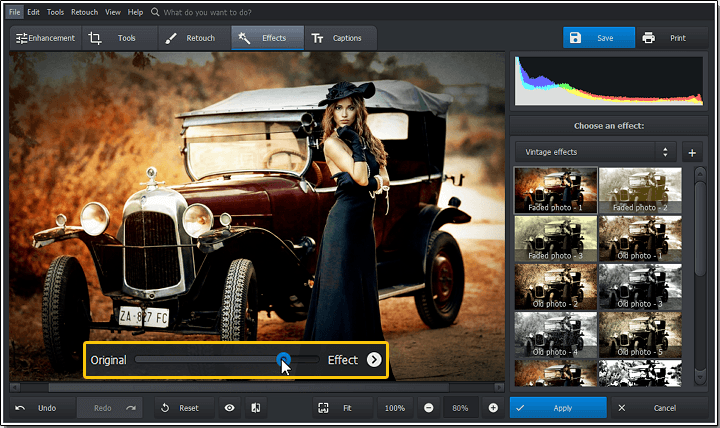
Source: PhotoWorks
Step 6: Save Your Edited Photo
Once you're happy with the vintage edits you gave for your photo, you can save the picture. Click the 'Save' button on the panel below the menu bar to save your edited picture. Photo Works will then give options as to what file format you require, and, from it, choose the desired one along with the quality settings.
Source: PhotoWorks
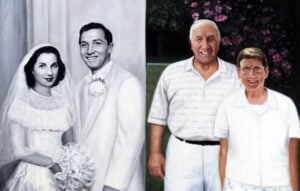
5. By Commission A Vintage Portrait From Mavenart
The best way to capture a memory in a vintage or retro way is to commission a vintage portrait with the best artist or art firm. Mavenart is an excellent choice for you if you want to commission a quality vintage portrait that can fill your heart with joy and nostalgia. They can make a vintage portrait for you that resembles a Renaissance or medieval portrait painting.

Source: Mavenart
Commissioning a vintage portrait can be an excellent and heartwarming investment. However, before giving a commission to the best commission art services provided by Mavenart, you must know the process and steps involved.
Step 1: Log On To Mavenart
The first step to follow before commissioning a vintage portrait from Mavenart is to connect with the relevant officials. You have to contact them by calling the number on the website or mailing them with brief details about the kind of portrait you are looking for.

Source: Mavenart
Step 2: Discuss Your Requirements
If you call them, let them know you are looking to commission a vintage portrait that features you, your family, or someone or something that is dear to you. You may mention that you are looking to commission a vintage portrait while mailing too, and concerned officials from Mavenart will get back to you soon to get the details.
Step 3: Discuss The Fees and Come To An Agreement
Once the officials get back to you, discuss with them about your set budget. Commissioning a customized vintage portrait is not cheap, but Mavenart can give you the best prices.
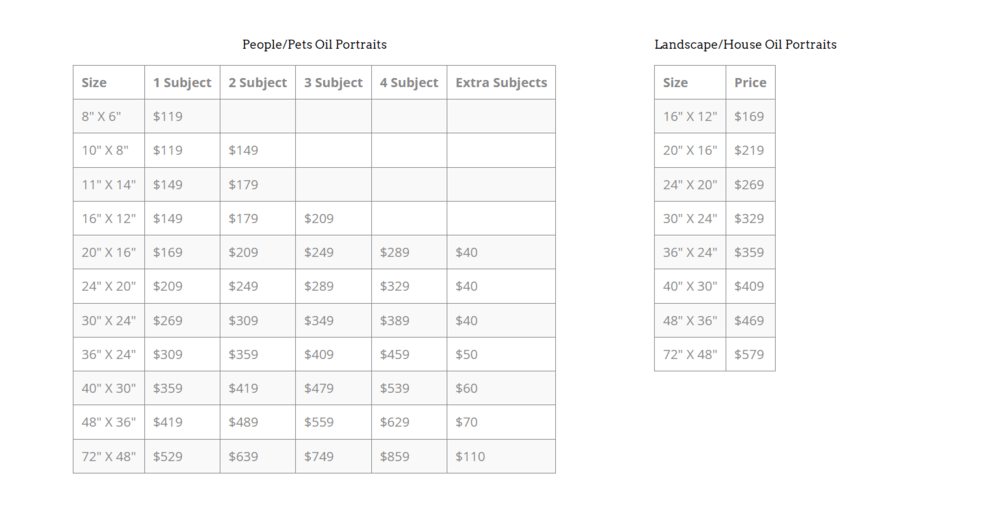
Source: Mavenart
Once you agree to the fees and other details, a skilled artist will get assigned for you to start working on the portrait. You must pay a small advance amount to Mavenart before starting the work, which is a standard procedure while commissioning artwork.
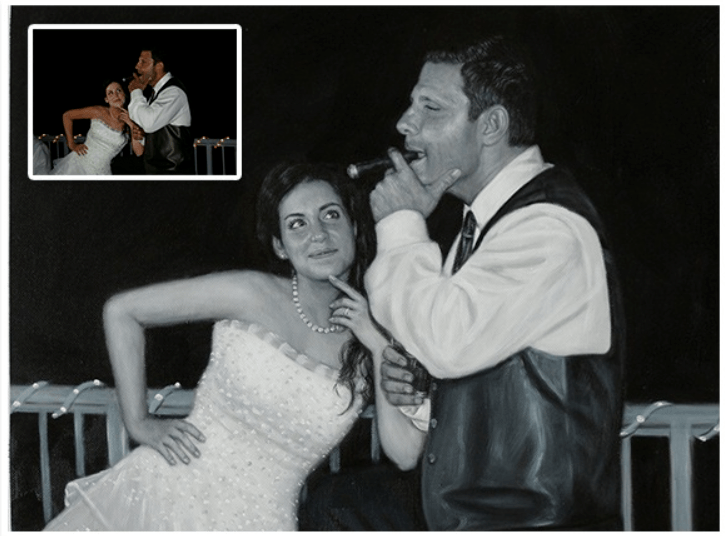
Step 4: Provide a Reference Photo
You now have to provide a reference photo from which you want to get the vintage portrait to the artist. If you don’t have such a photo, you can also give separate photos of the people and/or pets you want to appear in your commissioned vintage portrait.

Source: Mavenart
While giving reference photos, ensure they have a good distribution of light with no features of the person covered. Only a well-lit photo can help an artist capture the essence of a person in his painting.
Step 5: Receive A Complimentary Painting
Once all the details of the vintage portrait get fixed, Mavenart will work up a complimentary layout. They will complete it within a business day and email you the same. This complimentary painting can help you determine whether or not any more changes are necessary.
Step 6: Receive a Preview of The Painting
Once the artist completes some initial sketches of the vintage portrait, Mavenart provides you the opportunity to review them and give your valuable feedback. You can mention any required changes or adjustments to your assigned artist during this step.
Step 7: Approve the Final Portrait
Once your Mavenart artist completes the vintage portrait, they will show you the work for you to review and give your final approval. Once you approve of the painting, Mavenart can frame it too to match the retro vibe of the painting and ship it to you. The shipping will get done once you have paid the rest of the installment of the commission rate.
Source: Mavenart
Conclusion
If you want to give your photos a vintage look, there are five simple and effective methods you can use, which are discussed in detail in the article. The four photo editing websites with plenty of effective tools and commissioning a vintage portrait from Mavenart are the best ways to preserve memories as pictures with a retro feel.
Whatever method you like to use, you can refer to the steps mentioned below each of them to get the task done efficiently. I hope you found this article helpful in helping you achieve a vintage look to all your favorite images.
Recent Posts
-
 Paint Markers for Canvas: The Ultimate Guide to Choosing the Best Brands and Techniques
April 19, 2024
-
 Creativity on Raw Canvas - A Comprehensive Guide
April 19, 2024
-
 Canvas Sizes Unveiled: A Comprehensive Guide to Understanding Dimensions
April 19, 2024
-
 Essential Watercolor Supplies: A Comprehensive Guide for Artists
April 17, 2024
-
 Best Paint Mediums for Beginners: Choosing the Best Paint!
April 17, 2024